Shooting My First Music Video – Part 3 – Editing
The last part of shooting the Adesta Band music video, and the most difficult was the edit. If you haven’t already, take a moment to read “Shooting My First Music Video – Part 1 and Part 2 of this post that cover the planning process, pre-production, and the shoot itself.
[pullquote align=”full” cite=”” link=”” color=”” class=”” size=””]I decided to take a slightly different approach and use the Premiere Multi-Camera editing mode. [/pullquote]
I used Adobe Premiere to edit this project. I wasn’t quite sure the best way to approach this style of shoot would be. I typically organize clips in a rough scene order, but with so many takes and having done the shot with a single camera, I decided to take a slightly different approach and use the Premiere Multi-Camera editing mode.
[pullquote align=”full” cite=”” link=”” color=”” class=”” size=””]We utilized a PA system to play the song, and quickly blew both speakers.[/pullquote]
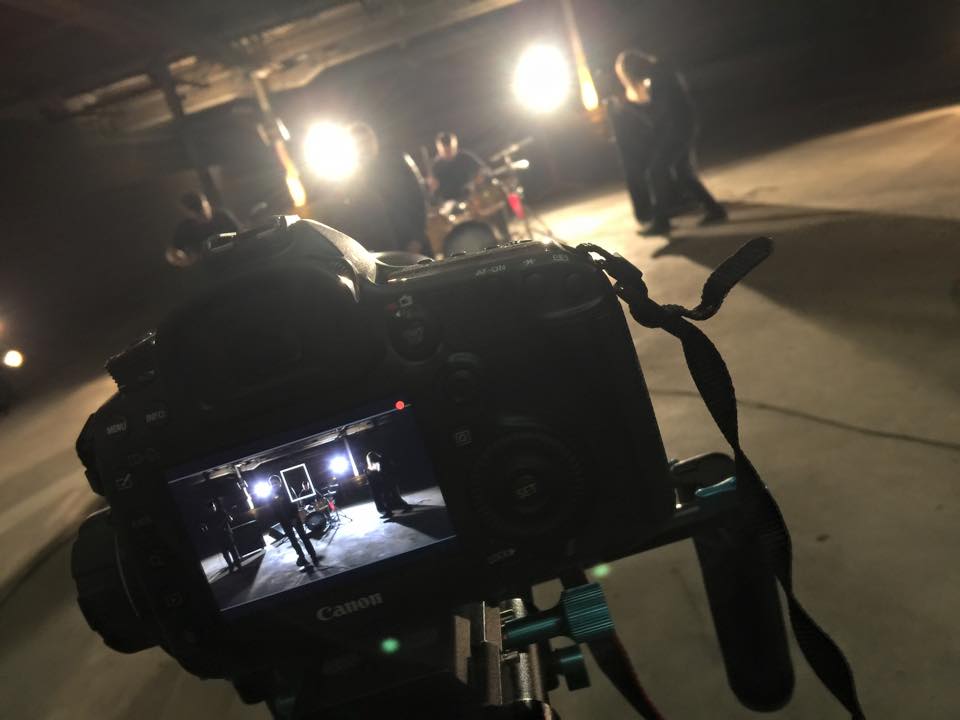
In this mode, Adobe offers a multi-monitor view where I could see all the clips playing in real-time at the same time. To set this up, I simply sync’d all the takes to the original song in the same sequence. You can then ‘enable multi-cam’ mode and enable multi-montior in the view settings to see all the takes. I saw simply, but lining up every shot with the music was actually a bit of a challenge. We had no reference audio for the clips. Initially our plan was to have the band play-along to the recorded track over and over again. We utilized a PA system to play the song, and quickly blew both speakers. The acoustics of the warehouse made this a deafening and difficult situation.
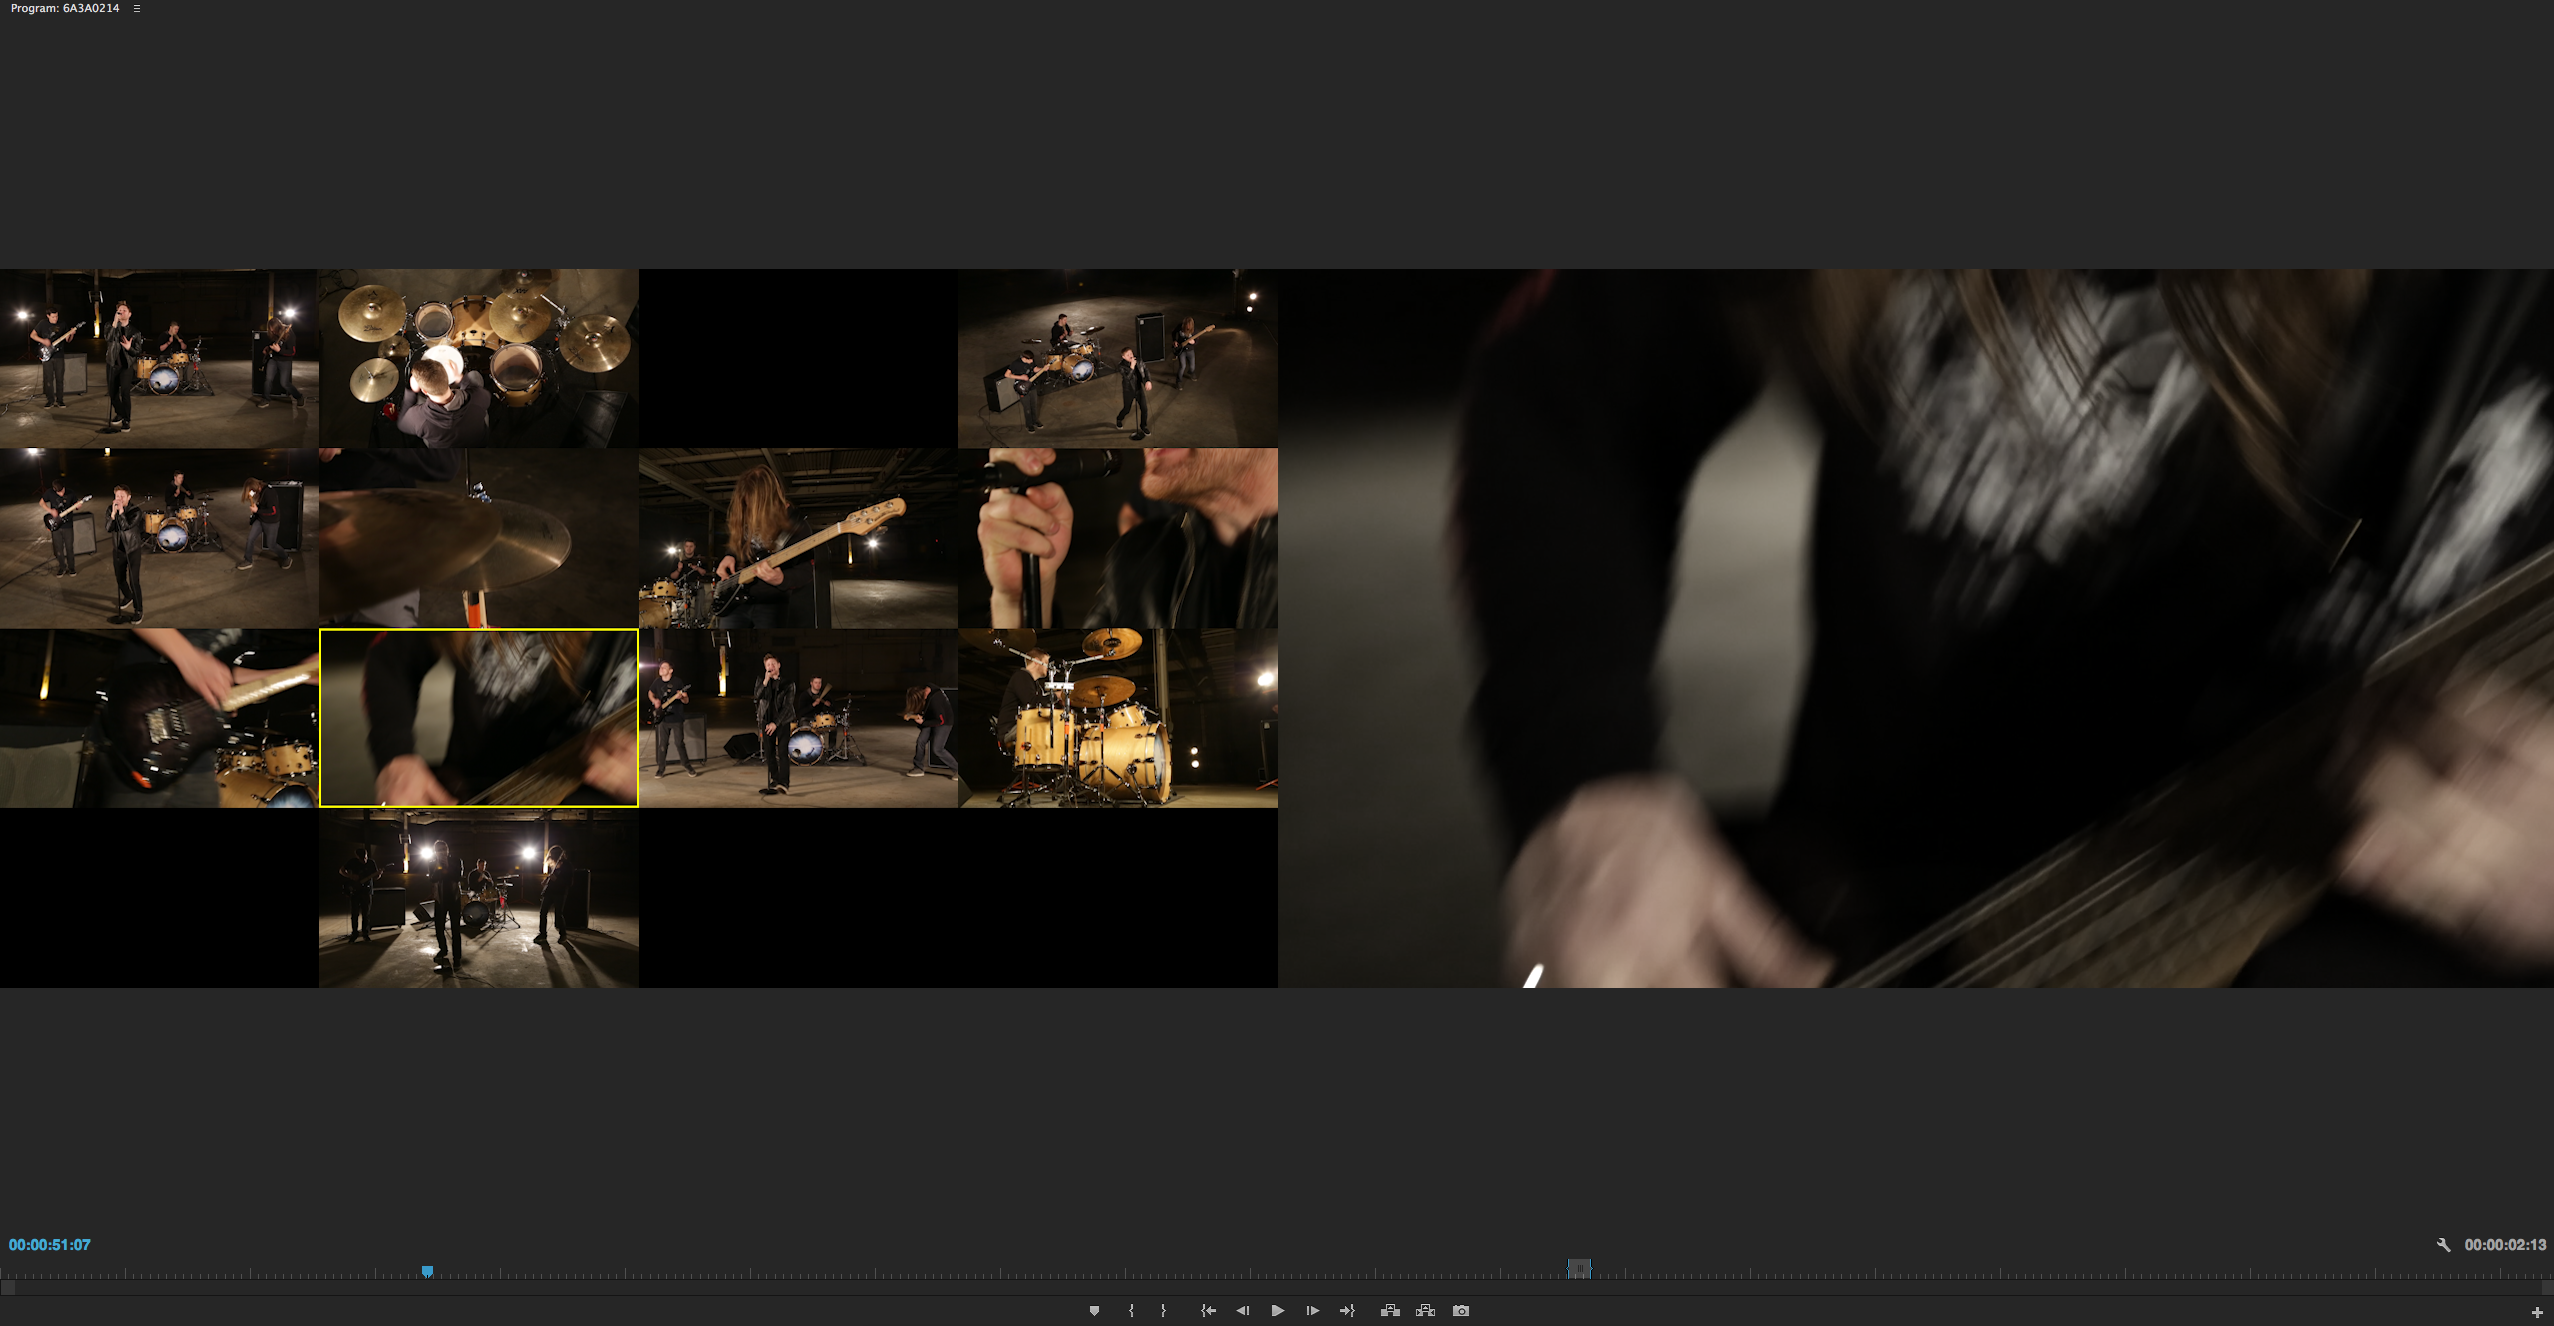
Multi-Cam View Setup
We thought we may be at a standstill after losing the PA system, as even while the system was functioning it was extremely difficult to hear the music and the band kept getting lost. Fortunately, the band was well prepared and well rehearsed. We ran the music through an ipod to the drummer only. The rest of the band, having played the song many times was easily able to play along with no reference track except for the drums. This setup worked pretty well, as there were only a few clips here and there where a note may have been cut slightly shorter or longer with the vocalist compared to the recording. With all the other tracks it was easy to switch to an alternate view in the few instances this occurred.
[pullquote align=”full” cite=”” link=”” color=”” class=”” size=””]You shouldn’t be required to nest the clips together, but it’s the only way I was able to enable the multi-monitor view.[/pullquote]
I’m far from an expert at Premiere Pro CC, but getting the multi-cam to function properly and ‘nesting’ the clips as required was a bit tricky. According to the instructions on Adobe’s site for multi-camera editing, you shouldn’t be required to nest the clips together, but it’s the only way I was able to enable the multi-monitor view. I actually had a difficult time finding any good tutorials that covered this with video. Perhaps I’ll create one in the near future.

In essence my editing process was similar to how a live broadcast would occur with live switching. I played the clip and selected the cameras I wanted by simply pressing 1, 2, 3, 4, etc while the clip was playing. Premiere records a new ‘mixed’ track which automatically has all the cuts.
There are many cuts, which I found necessary to keep things interesting since there was only a single scene with the musicians and nothing else to cut away to. I also wanted to pace the cuts with the music, so you will find as the song peaks towards the end the cuts become faster in pace.
[pullquote align=”full” cite=”” link=”” color=”” class=”” size=””]This technique probably wouldn’t work, even at the lowest playback quality on older machines, or even newer machines with less than top-of-the-line specs.[/pullquote]
My editing computer is a 2012 iMac i7 3.7G, with 32GB RAM, and a 1TB Fusion drive. It still struggled to play a dozen HD clips all at once. This technique probably wouldn’t work, even at the lowest playback quality on older machines, or even newer machines with less than top-of-the-line specs.
Once we had a few working rough cuts, you can re-record your switches between cameras as necessary, replace individual clips, or lengthen or shorten cuts just as you would normally do in a traditional workflow.
We had done quite a bit of planning prior to the shoot, but the actual style or ‘storyboard’ if you could call it that for the final product was non-existent. We simply planned the shots we wanted to have throughout the video. We quickly recognized a definitive opening and closing shot, but everything in between was up in the air.
After the rough cut, I had the singer (Brandon Devens) join me for a viewing and we collaborated on how and who to switch to. It was important we had a relatively good balance between all the musicians in the band, but I didn’t want to cycle the same order over and over again.
We had shot some b-roll around the warehouse in which the video was shot, but given the nature of the video anytime it was cut too seemed out of balance with the feel of the music. In fact, the only shot we ended up using was a focus pull of the crack in the floor. The way the music had a pause and a tense feel it just seemed to fit. We had also experimented with a slow-motion ‘jump-from-an-amp’ shot, but again with the feel and pacing of the video a several second slow motion clip seemed to be a harsh transition and we decided not to use it.
[pullquote align=”full” cite=”” link=”” color=”” class=”” size=””]Everyone says planning is the most important aspect, and I would fully agree.[/pullquote]
This was really the first video project I had planned from start to finish, executed, filmed, and edited myself. I have read a tremendous amount about video production and it was definitely a huge help. Everyone says planning is the most important aspect, and I would fully agree. Going into that warehouse with a decisive plan eliminated a lot of questions. Even though I wasn’t sure how I wanted to piece it all together in the end, I knew what shots I wanted, how I wanted to get them, where we would setup, and how we would light it. It made the setup for the shoot extremely easy.