The Day of the Shoot
I’m sorry it has taken so long to update this blog thread with this section, but as with everyone life is busy. My memories of the day of the shoot is still clear as day!
We wanted to start getting setup at the location around 7AM to give us plenty of time to work out any kinks, get everything setup, and leave plenty of time to shoot. The first thing in the morning I went through a checklist of my gear to ensure everything was ready to go. The night before I charged all my batteries and lined all my gear out, so in the morning I could do a quick double check, get it packed up and get to the location. I wanted things to be right since it was my first music video shoot!
I bought a card table and wish I had bought two larger folding tables. I wanted a table to setup my laptop to review test shots, as well as a place to sit and review footage during any breaks, or at least a place to eat lunch. It turned out the lesson learned here is bring several larger tables. Everyone will find a reason they need a spot on your table and things got crowded quickly. I use a 2012 Macbook Pro 13” Retina, it is a base model with 4 gig or ram , i5 processor, but I did opt for the 128G SSD. It does just fine for reviewing video, doing basic editing, and everything else for that matter. With most things on the cloud and dirt cheap USB 3.0 drives I wasn’t the least apprehensive having only 128G SSD.
[pullquote align=”full” cite=”” link=”” color=”” class=”” size=””]We had basically no budget.[/pullquote]
Lighting
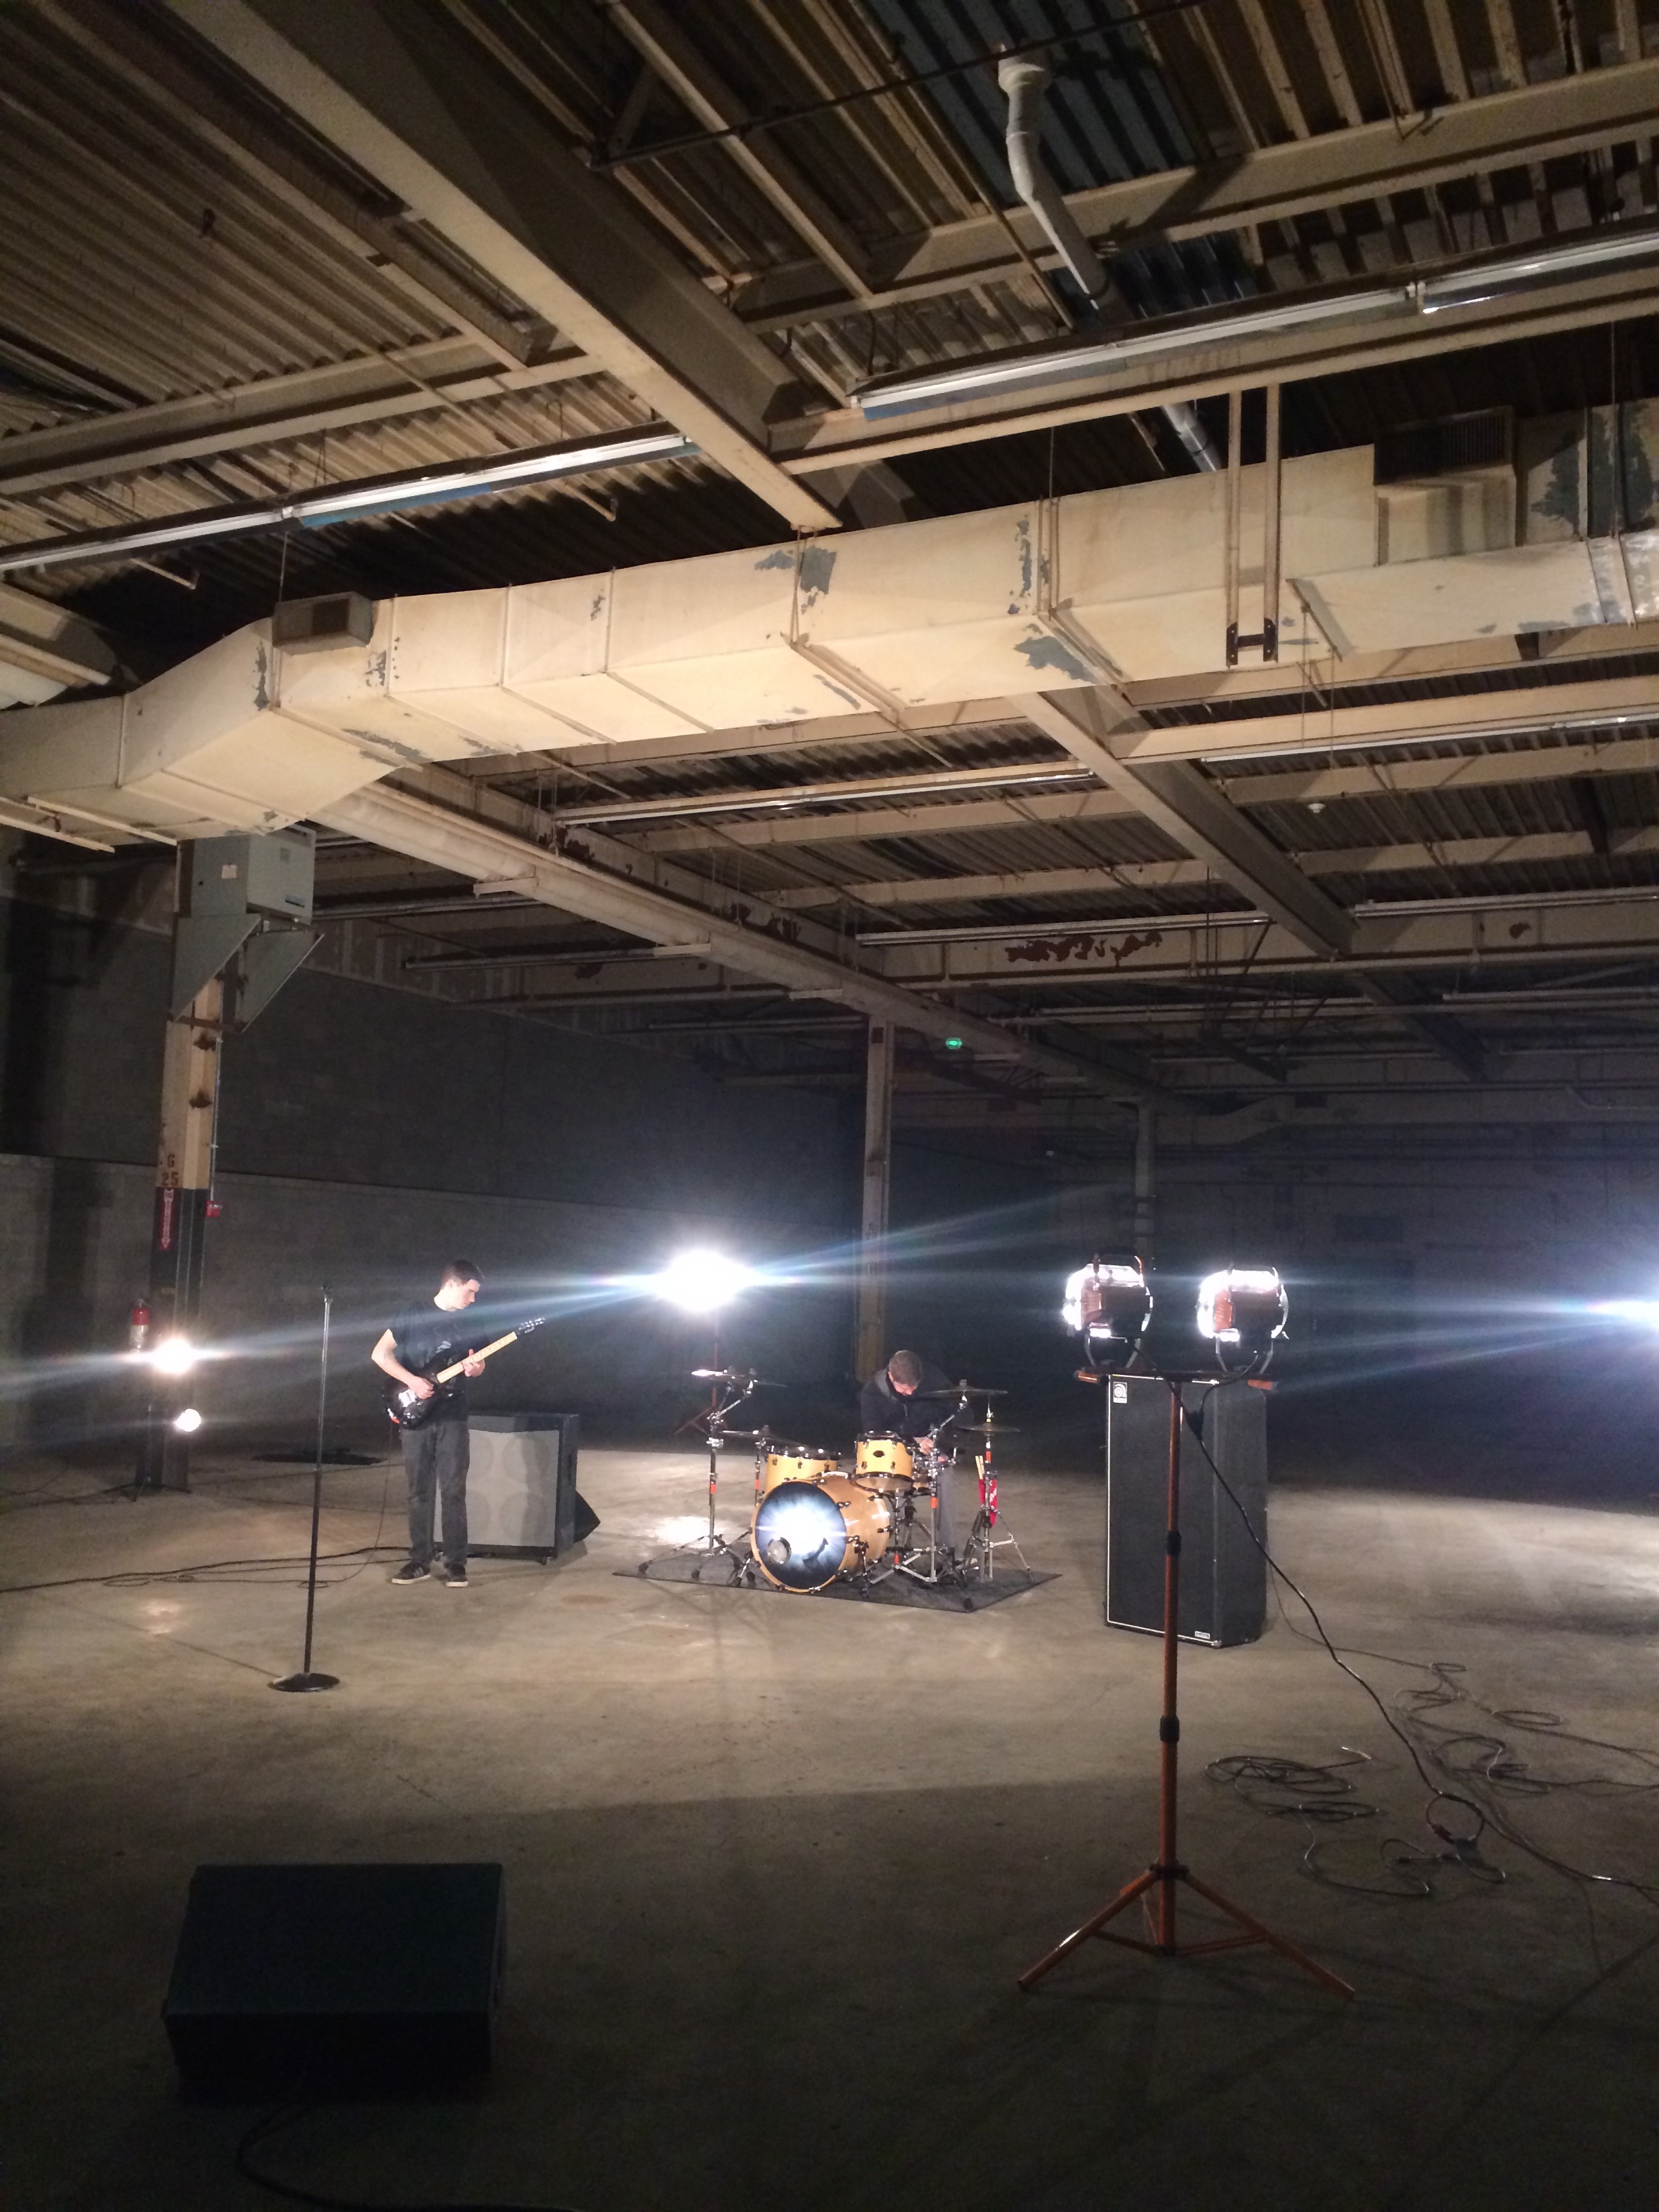
Recall in Part 1, The band had purchased some work lights ( link to Lighting Kit ) and a few other things we had discussed earlier in our planning. Unfortunately, we did not have the time to test any of this lighting equipment prior to the day of the shoot. Fortunately, the lights all functioned out of the box, however, to my dismay the stands only went about five feet tall. I instantly started to think about ways we could strap lights up higher, or things we could stack underneath the stands to raise the lights up to get more of the 45 degree angle we had previously discussed.
[pullquote align=”full” cite=”” link=”” color=”” class=”” size=””]I had no safe way to secure the lights in a higher location.[/pullquote]
It turned out, after various attempts and experiments I had no safe way to secure the lights in a higher location. We were just going to have to deal with it, and the result was that we had some pretty harsh shadows to contend with, including myself as the camera man going between lights and band members. I’m not sure what lesson was learned here, as there was nothing I could have done short of owning my own lighting gear that would of made this go any smoother. I know now that when using work-lights I will need to make sure I have something to shore up the lights to get a more pleasing angle.
The four double work lights were setup more or less on the 4 corners of the area where the band had setup. We had a light front left, front right, rear left, and rear right. Based on scouting the area earlier, I knew we would need some up-lights to illuminate the support beams behind the band. Without this, it would of appeared the band was in an infinite black space, which may work in some situations, but with the camera movements we had planned the viewer would lose all perspective. Using small work lights, we had them on the floor pointing up at the support posts. We did this two rows back and the final product provided exactly what I had planned, a nice perspective for the movement of the camera and scenes.
[pullquote align=”full” cite=”” link=”” color=”” class=”” size=””]Had it been a few weeks earlier shooting with the 5D Mark II, I probably would have been in trouble[/pullquote]
Despite all the work lights, there were still some gaps in the light. The band had their spotlights they use at shows, they were basic MBT spotlights and ended up filling in some gaps as well as providing a great look on the sidelines.
We did a couple quick test shots to see how the lighting would look out of the camera and made adjustments to the lights in the form of distances and reviewed shots. Obviously the tighter the lights were to the band the harsher the shadows and when pulled out the shadows slowly degrade, however so does light output. Even with all the lights I was shooting at an ISO of 1600, fortunately with the Canon EOS 5D Mark III , it wasn’t much of an issue, but I’d rather of been shooting at 400 or 800. Had it been a few weeks earlier shooting with the 5D Mark II, I probably would have been in trouble as the noise at 1600 is more considerable than on the Mark III.
In testing the lighting situation, we happened upon an unplanned look where the only the rear lights were illuminated, leaving a silhouette of the band members. It looked awesome in real life and I instantly knew it would translate well in the camera and looking at the final product it was a cool alternate scene I was able to cut too on occasion in editing.
[pullquote align=”full” cite=”” link=”” color=”” class=”” size=””]We struggled through a few takes, then inevitably the PA system blew.[/pullquote]
The Filming Process
As far as the band performing, the original plan was to have them play along with the track through a PA system. It was immediate clear this was going to be a challenge given the acoustics of the room. The music was blasting, and with the live drums playing along the noise was nearly unbearable. The band was struggling to keep things together, as they were having a hard time hearing the music.
We struggled through a few takes, then inevitably the PA system blew. There was no backup plan, and no backup PA system. We weren’t sure exactly what blew, was it the amp? Speakers? A bad wire? After about an hour trying to get the PA back up and running, we realized we needed to move on to something different.
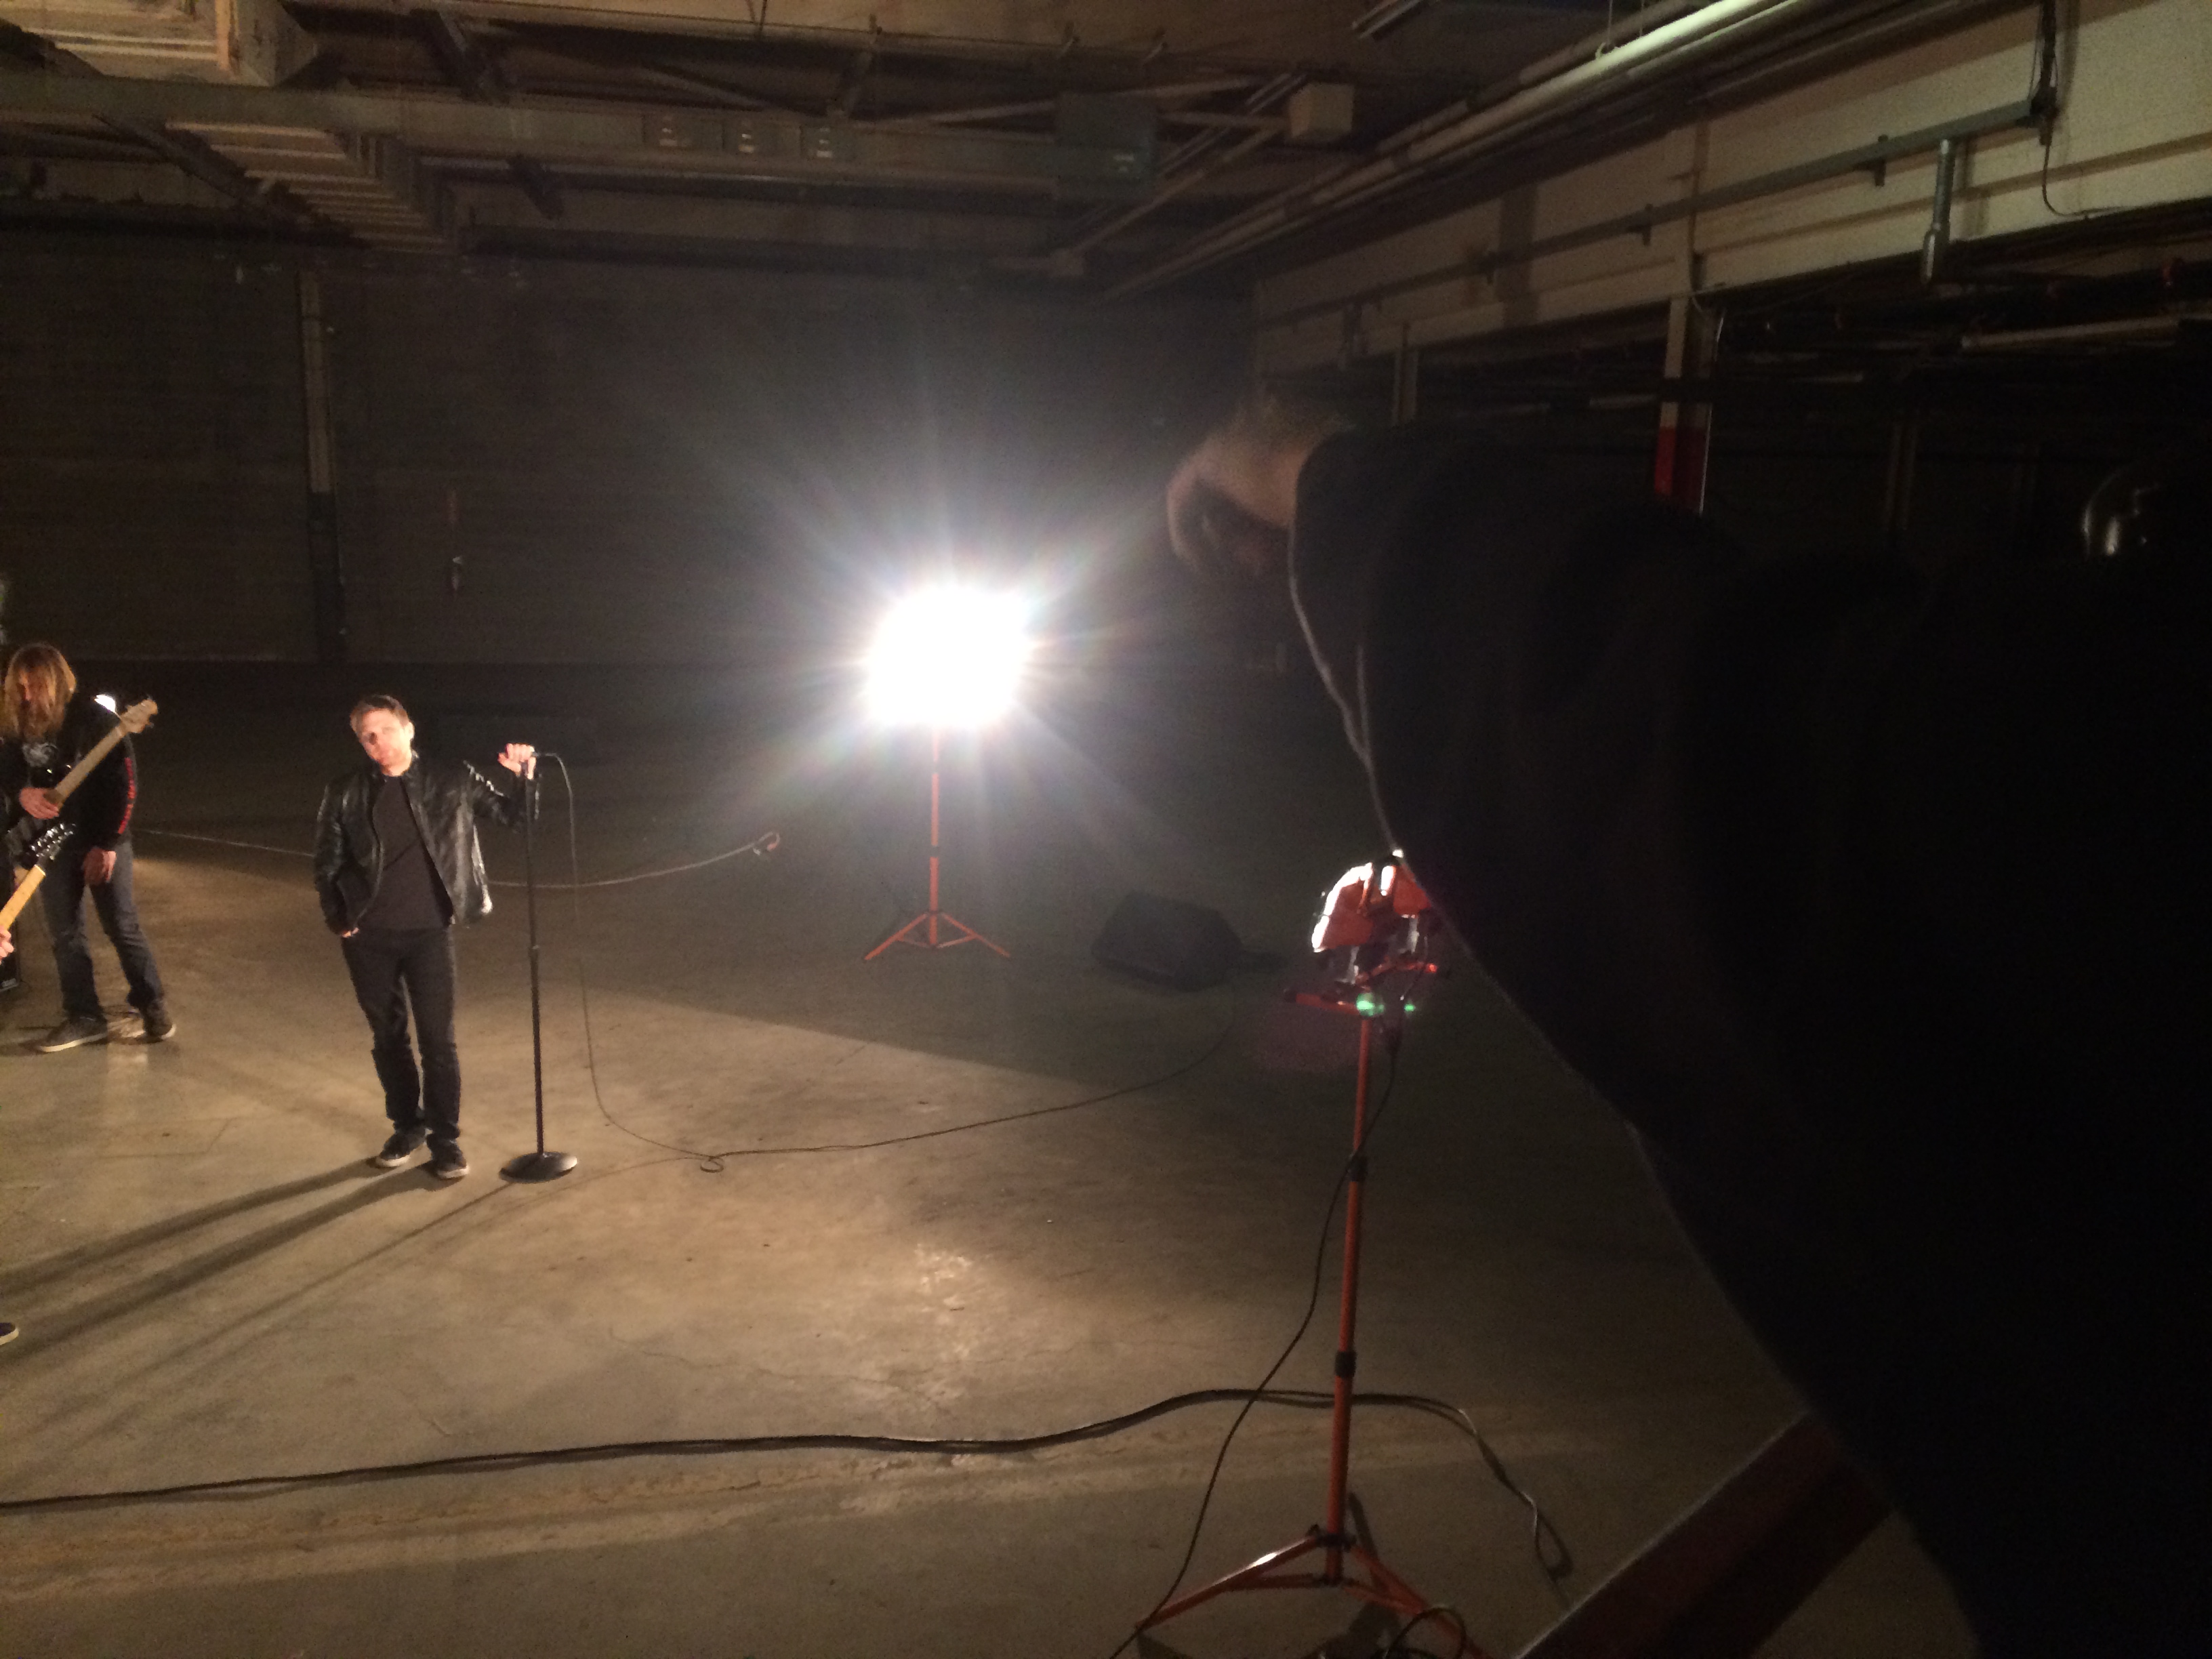
The band had decided since they were so well rehearsed, it would be no problem to play along with just the drums. The drummer loaded the tune on his iPod and used headphones and played along with the track. Fortunately, the band laptop had a version of the track with a click on hand. Without this stroke of luck, we would have been out of business.
This configuration worked out far better, as things were much quieter. We use cloth and tape under the cymbals to greatly choke the sound out, but had to be careful to keep the shots above the cymbal line.
[pullquote align=”full” cite=”” link=”” color=”” class=”” size=””]A scissor lift does not track straight, and doesn’t turn smooth, so lining up the shot straight was a tremendous challenge.[/pullquote]
We had purchased a lawn cart we were hoping to use as a dolly, and unfortunately it was unusable. The shots were far to shaky and unnatural and the movement was very inconsistent. However, we were blessed with a bonus we were not planning on or expecting. A serious scissor lift was in the facility we were shooting. A few quick tests and we realized it would do.
The opening and closing shots of the video were shot simply by placing the camera on the floor of the scissor lift, but the shot was still not easy. A scissor lift does not track straight, and doesn’t turn smooth, so lining up the shot straight was a tremendous challenge. It took about 9 or 10 takes to get a usable shot for the opening shot and another 9 or 10 takes for the closing shot. One issue that arose was inability to pull focus during this shot and because of the 1600 ISO and lack of lighting I was forced to shoot at between F4 and F8, which led to some blur as the camera pulled into the band.
The Gear
Interestingly, the majority of shots employed the scissor lift. I’m not sure how I would of approached the shoot without it in retrospect. I think the final product would have had much less movement and probably not been as interesting. We used the scissor lift to go the ceiling for a birds eye view of the band. We also used the lift in a pre-determined arc and ran it back and forth for a take, this provided a slightly elevated dolly-style shot. Lastly, we used the lift behind the drums to get a view straight down and even employed “up and down” motion with the lift while shooting.
[pullquote align=”full” cite=”” link=”” color=”” class=”” size=””]Every angle was a take through the entire song.[/pullquote]
I have a Flex Skater Dolly I had purchased on Amazon. I had used it a few times, but it wasn’t quite as convenient to use as the marketing made it seem and it primarily has sat in a box. I brought it along anyhow and was glad I did, as playing around we got some cool test shots moving around the drums. The few shots you see tracking in an arc around the drums was the skater dolly on the floor, being pulled with a rope in the pre-determined arc. It was difficult with the rope to get it to track slow and steady, so I ended up moving it a little bit quicker and sacrificed slow motion for smooth and consistent motion.
I also employed the use of my Konova Camera Slider Dolly, an inexpensive but decent slider solution. The Konova slider requires a large mounting plate, at 3 feet most tripods and heads will wobble as the camera moves to the ends of the slider. Fortunately, using the large Monfrotto head offers a much larger surface area to mount the slider securely. We ran the song several times, and I moved spot to spot sliding back and forth in strategic places where there was nice perspective. The most common shot from the slider are the reveals from behind the support posts, and a few looking through the light fixtures.
Wrapping the Shoot
All in all there were a lot of runs through the song. Every angle was a take through the entire song. We did a take with the camera straigt on, full band. We did a take with the front lights off for the silouhette effect. We did a take for each tight shot of each individual player, and moved some lights about to maximize each individual shot. While it’s not obvious, a careful eye will notice the lights move in on certain shots, but because the perspective of the tight shots is so different than the wide shots, it’s hard to notice the lights move.
[pullquote align=”full” cite=”” link=”” color=”” class=”” size=””]Wrapping that day was a huge relief[/pullquote]
It’s was exhausting for both the band and I as we approached the ten plus times running through the song. It wasn’t especially long and in planning it seemed we would endlessly be able to run a 5 minute song over and over again, but even with the shoulder rig, and mixing in the slider and tripod shots, my hands were shaky and shoulder and back was aching by the end of the day.
After all the shots were done, I decided to roam around the room and shoot a little B-roll, however in editing I didn’t feel any of it really fit, with the exception of one shot that appears in the finished product where the is a focus pull on a crack on the concrete floor. It just seemed to fit and make sense for that moment in the song.
Wrapping that day was a huge relief, but despite my exhaustion I’m sure you can imagine how quickly I wanted to get home so I could drop those files to my desktop and really see the quality of the footage!
In the next part, the final part, aka Part 3 I will go into reviewing all the footage and the techniques I used to bring it all together.
The owner of this website, Justin Varuzzo, is a participant in the Amazon Services LLC Associates Program, an affiliate advertising program designed to provide a means for sites to earn advertising fees by advertising and linking www.varuzzo.com to Amazon properties including, but not limited to, amazon.com, endless.com, myhabit.com, smallparts.com, or amazonwireless.com.